
I am using DigitalOcean for hosting my Ghost blog. Any instance of hosting in DigitalOcean environment are called Droplets (wonder why?).
Mostly setting up a Ghost blog in DigitalOcean environment is pretty much easy. But after few days I realized that the setup is good enough for 'getting up and running' and I had to fiddle and fix many thing to reach my satisfactory goals. Offcourse I give full credits to all articles and knowledge-base provied by DigitalOcean team.
Things that makes me write up this lengthy post:
- Ghost ready droplet gives only basic setup of Ghost.
- Had to add more steps to secure my droplet to some extent.
- Wanted to host Ghost with MySQL instead of Sqlite3.
- Setup Ghost instance in a way so that I can add more Ghost instances or other websites in same droplet.
I have divided this process into three part (this is Part 1 of 3)
Let's begin:
First we will create a droplet in DigitalOcean account.
Step: Sign-up or Log-in into your DigitalOcean account
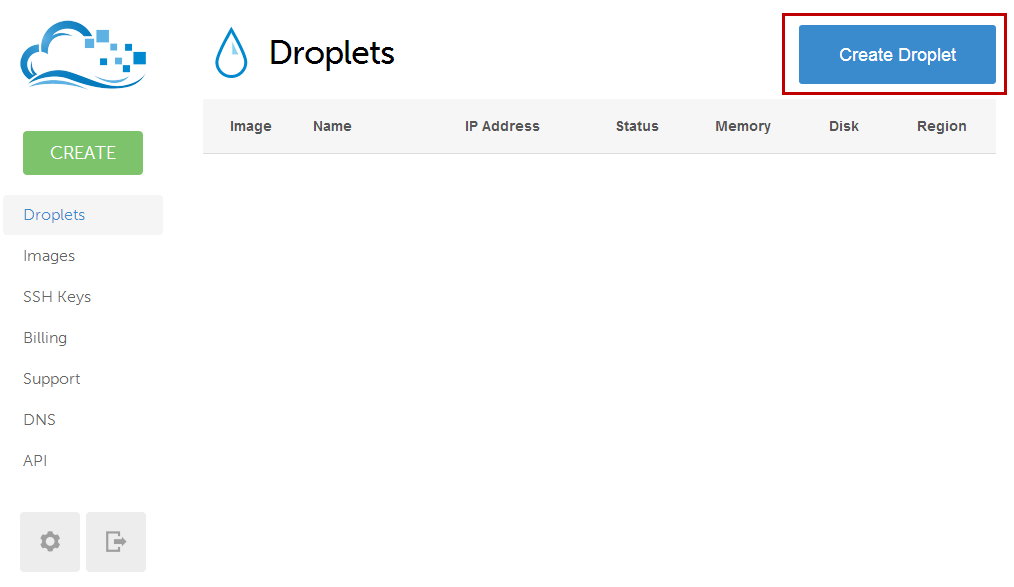
Step: Click on Create Droplet
Step: Select a host name for your droplet
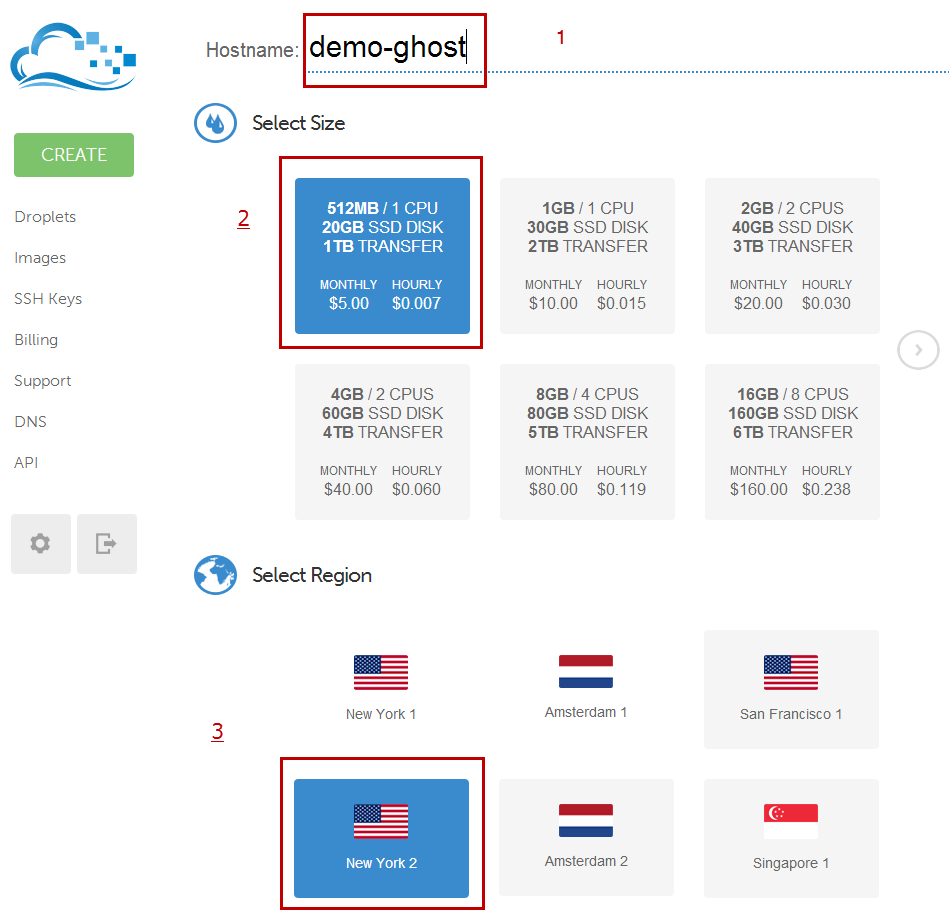
You can choose this as per your needs.
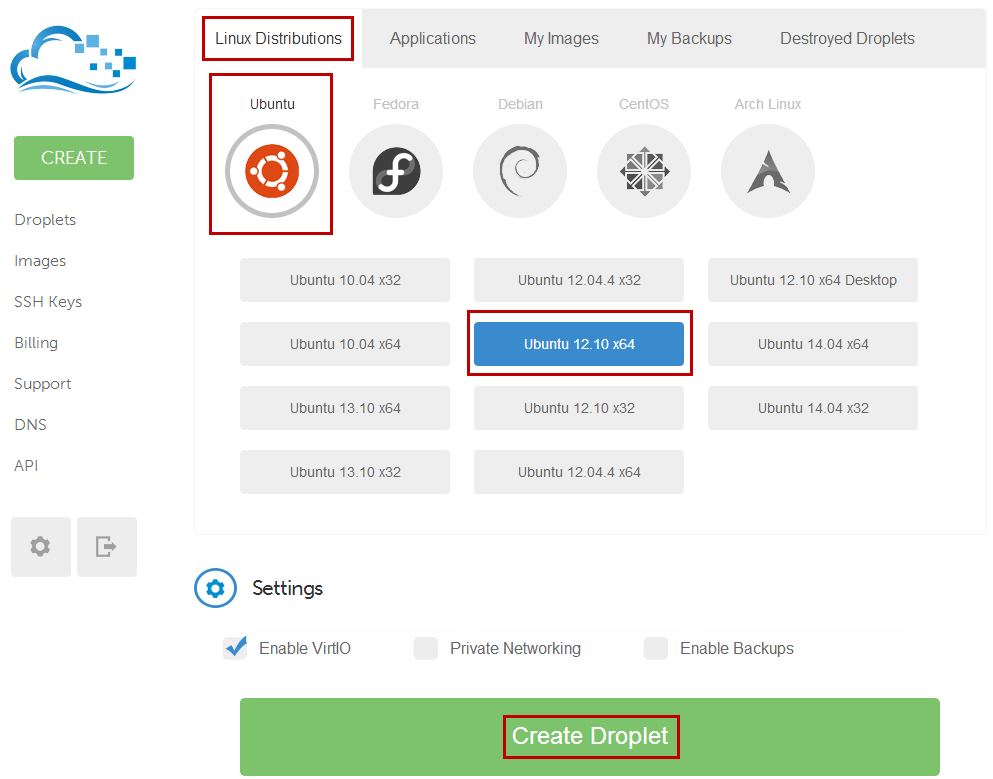
Step: Select image, make sure you select Linux Distribution > Ubuntu 12.xx image and not Application > Ghost on Ubuntu 12.xx. But off-course if you wish to use Ubuntu 13.xx or Ubuntu 14.xx its fine.
Update 8th Sept, 2016: This works fine now with Ubuntu 16.04.1 x64 and Ghost 0.10.1 - tested it myself.
In few moments your will have your droplet ready. DigitalOcean will send you the root user login credentials in registered mail address. If not received Droplet > Access > Reset Root Password to reset it again.
Step: Click on the newly created droplet > Access Tab > Console Access.
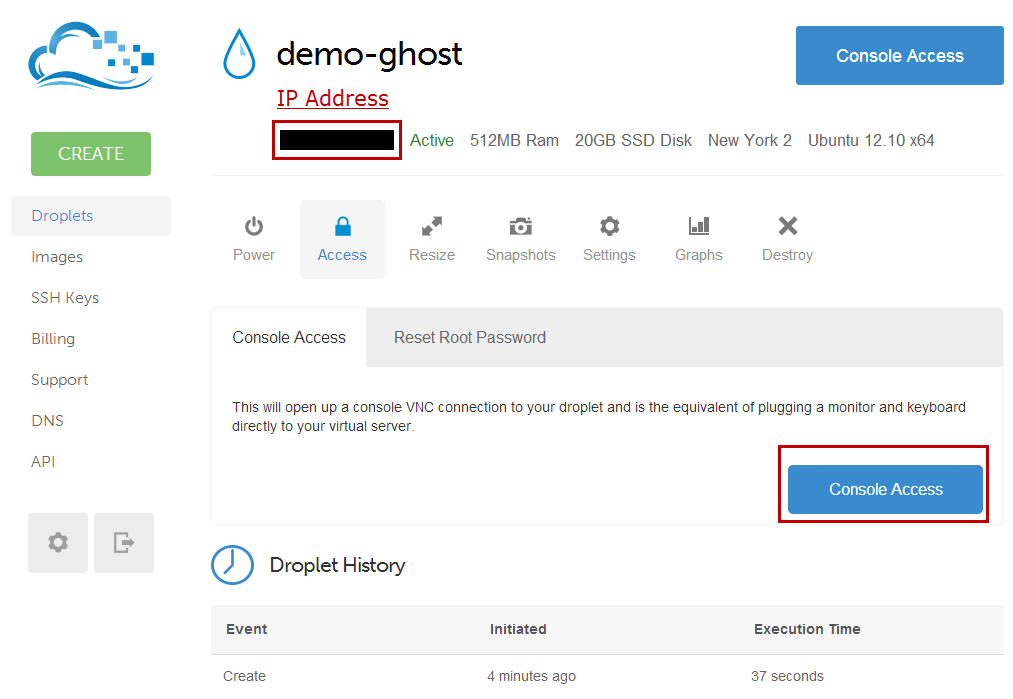
This will take you to the main console (tty1) of your droplet. On login prompt enter your credentials (received in mail).
Now first thing first, we will secure access to this droplet to specific user only via specific non-default port.
Step: Change password of root user (keep in mind: make sure this password is complex enough and not shared with anyone)
If you are not logged in as root type:
sudo -i
Now change password of root:
passwd
Enter your new password two times.
Step: Add new user which you can use to SSH into this droplet (eg: demoghost):
adduser demoghost
Step: Add this user to SUDO group:
sudo usermod -aG sudo demoghost
Step: Add newly created user to sudoer
sudo visudo
Step: Find the following line : root ALL=(ALL:ALL) ALL and add a new line after it:
demoghost ALL=(ALL:ALL) ALL
Save this changes (Ctrl + x > Yes > Enter).
Step: Edit SSH configuration
Open SSH config in NANO editor (your can use your choice of editor)
sudo nano /etc/ssh/sshd_config
Find following line:
Port 22 and replace default port number 22 to port number of your choice.
Next find following line:
PermitRootLogin yes and change it to PermitRootLogin no
Next go to end of the file and add following line:
AllowUsers demoghost
This line will only allow listed users to login via SSH (demoghost in my case).
Next find following line:
LoginGraceTime 120
change the value 120 to 20.
Save the configuration changes (Ctrl + x > Yes > Enter).
Restart SSH server:
sudo service ssh stop
sudo service ssh start
Now you can close your console access and login (using new user - demoghost) to your droplet via SSH using cmder or putty or tera-term (on Windows) or Terminal (on Linux).
Proceed to Part 2 of Installing Ghost on Ubuntu, Nignx and MySQL