
You can easily find yourself in a situation where you keep refreshing your mail box waiting for a reply from your hosting provider support team about the issue you are facing and hope to get fixed. The more you expand or grow in your business, the more is the need of hosting capabilities, features, resources and power to gear up the one that makes money for you. Yes I admit finding a better or I can say best hosting solution is the most wise decision you should take, but there are times when you need to host your own business. This steps will guide you to setup and configure ADDS with DNS server to start up with hosting your own domain.
Anyways that is not the point, I am just writing this so that I don’t need to remember basic setup for installing Active directory domain services for the clients I serve. Smirk Smirk. As one wise man said “Just blog, if not for anyone else at least for yourself, so that you can google it later on when you need it” - S. Hanselman
The idea: You want to learn on how to host your own website or portal for some domain name “example.com” you own, using Windows server 2008 R2.
Note: Make sure to rename your server the way your want before starting so you don’t need to worry for changing name of server later on and mess up your hard work.
-
Step 1: Yes it all starts with the boring installation of “Windows Server 2008 R2” (or whatever your choice may be).
-
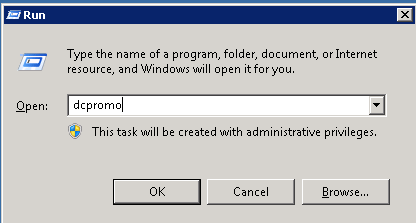
Step 2: Once you are all ready with the server up and running, hit “Ctrl + R” and type “DCPROMO” + Enter to create a new domain controller and create active directory.
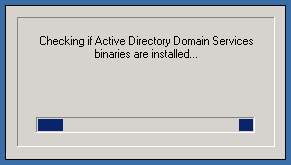
- Step 3: It will run some pre-checks, wait until its all ready to start configuring
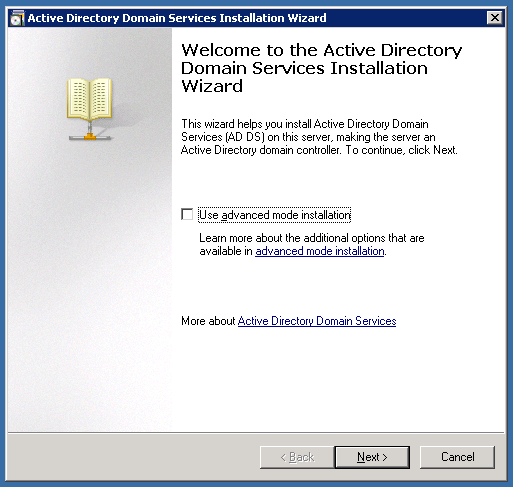
- Step 4: Once all the pre-check are done you will be welcomed with a startup page for the installation of active directory domain services. Normally you can go forward with it and it takes default values for most of the things, but I suggest you click on “Use advanced mode installation” for this one, then click next.
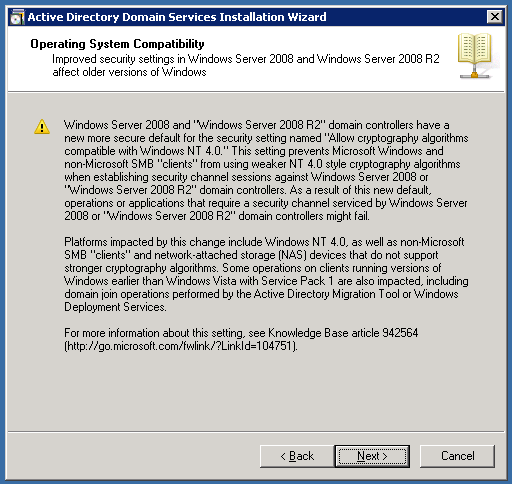
- Step 5: This step shows a summary about the new enhanced security settings introduced in Windows Server 2008 and R2 edition. If you have some pop-corns ready or are very particular of everything you do, read it all. Once read click next.
-
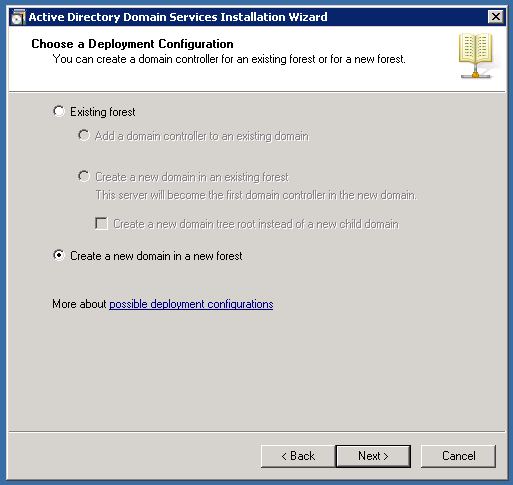
Step 6: This step brings you with two option
- Choose Existing forest
- Create a new domain in a new forest.
There is a whole new world to explore and understand what you can do with forest and domains using ADDS I suggest you refer – Supported Active Directory Topologies. For this example purpose, assume you are creating the first domain controller in new forest. The “FOREST” is more conceptual and “domain controller/s” is what makes the forest with different combinations. Choose “option 2” and click next.
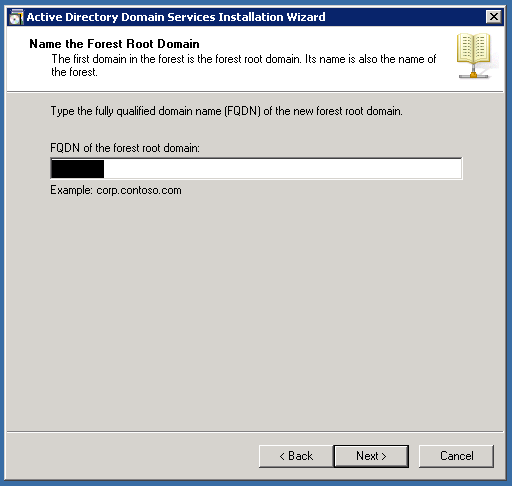
- Step 7: Here you specify the name of the domain you want your sever to host some website or application primarily for. Don’t worry you can host other domains on this server later on. “FQDN of the forest root domain” – type – “example.com”. FQDN is Fully qualified domain name and you can read its Wiki if you are new to it. If your server’s name before the installation begins is (lets assume) “testwin2008” then after this installation you can refer your server as “testwin2008.example.com” so choose and type your FQDN wisely.
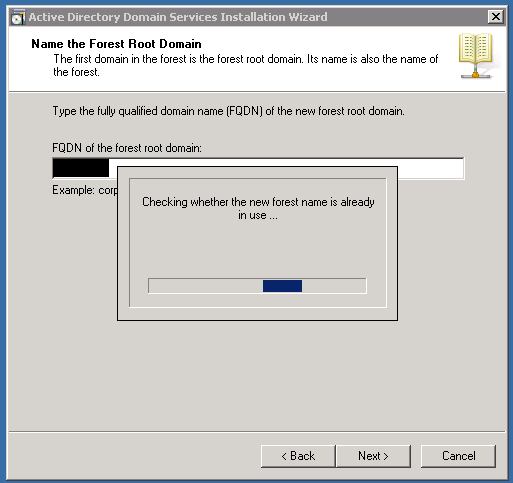
- Step 8: Now it will check whether the new forest name is already used or not. As you we choose “Create a new domain in a new forest" we believe we are not going to run into any problem after this check.
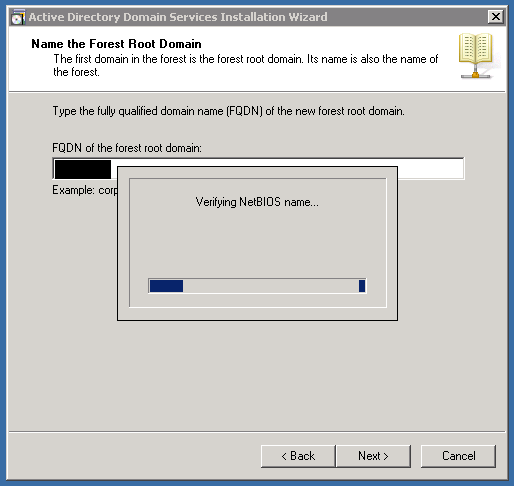
- Step 9: Next it will verify the NetBIOS name you gave previously. NetBIOS is acronym for Network Basic Input / Output system. It is the name the network layers understands and is used to communicate with the system and network.
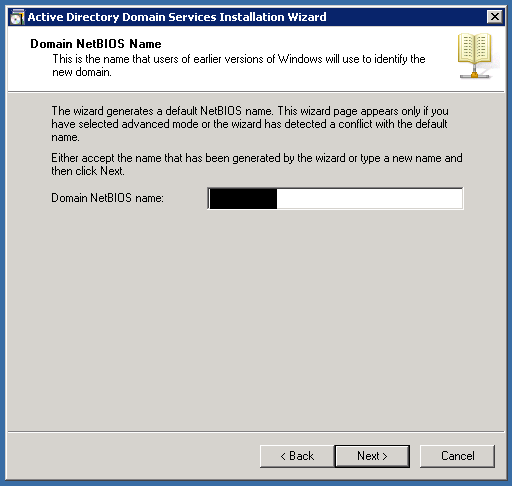
- Step 10: In this step you provide the “Domain” NetBIOS name. This name is the short (primary) name for the domain controller you are installing on your system. If the NetBIOS is “test” and I have a user “Foo”, then I can login as “test\Foo” and password to login using the domain user account. Type in “testwin2008” (or anything of your choice) and hit next.
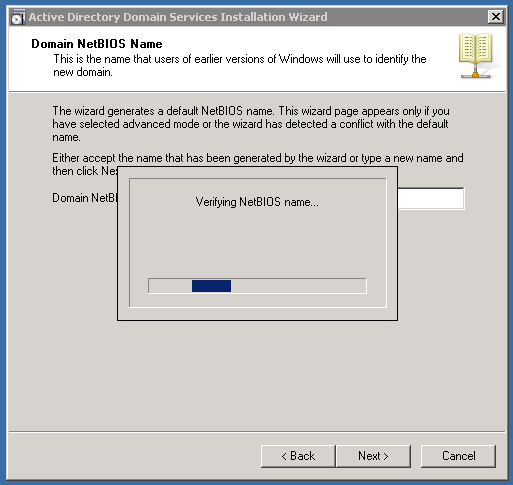
- Step 11: Again it verifies the Domain NetBIOS name for any conflicts or errors.
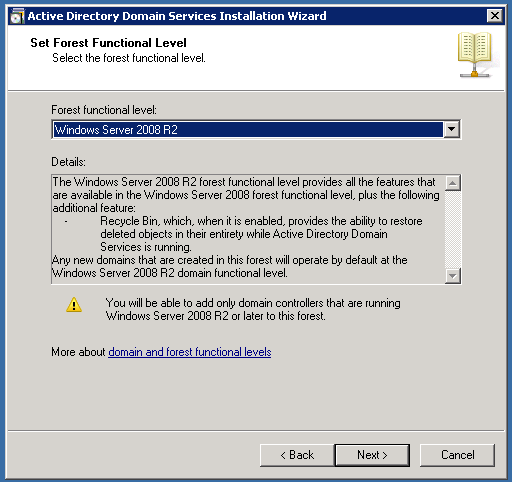
- Step 12: This step will configure the “Forest functional level” and gives you options to choose the functionality and features you can provide in your domain network’s computers and users. You can read the details for each options available and choose the one suits you the best. Notice the warning “You will be able to add only domain controllers that are running Windows server 2008 R2 or later to the forest”, choose “Windows Server 2008 R2” as forest functional level. Click next.
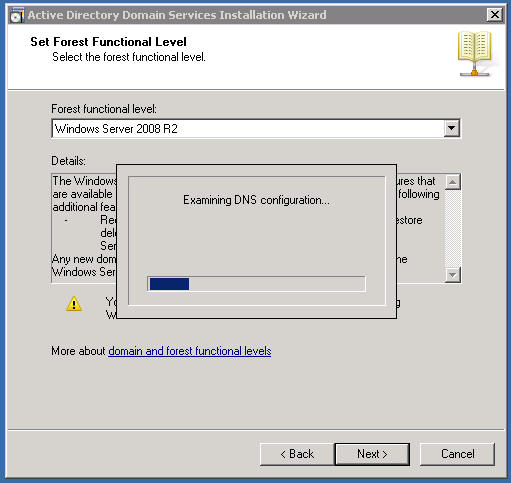
- Step 13: It will now start examining the DNS configuration and starts cooking for the DNS in the ADDS installation.
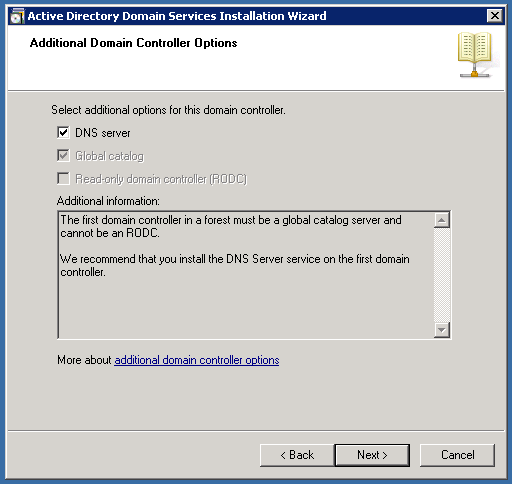
- Step 14: Once it examines the DNS configuration it will show step with additional options for the current domain controller getting installed. It says that first domain in forest must have a global catalog server and cannot be RODC. If this is the first DC on the forest, it is recommended to install DNS server on this machine, as we are not planning to have another server in the forest (not at-least right now) and want to host our website / application for own domain name so we check the DNS server option and hit next.
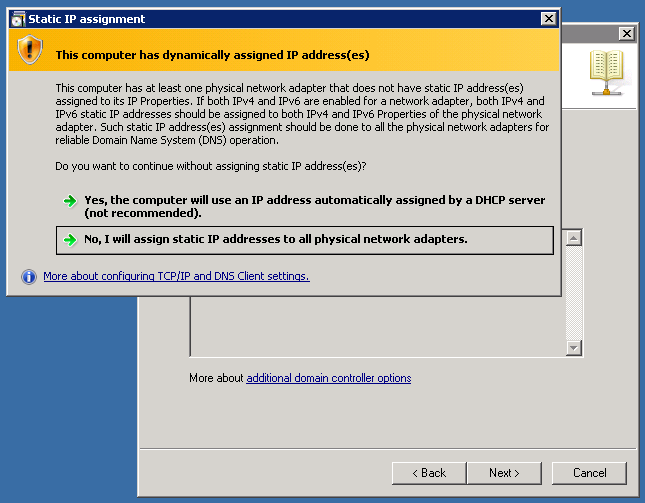
- Step 15: his is a very important step and should understand what it proposes. If in any case your server has any dynamic IP Address configured this warning will show up. Having dynamic IP Address on domain controller is not recommended as it is the base to serve other services, computer and users so the one who is serving should be static and retain its identity. In my case I had a “Loop back address” configured to use dynamic address initially to demo this case. Freeze where you are and go and configure your all network connection to use static IP Address. Though you can go forward using “Yes, the computer will use an IP Address automatically assigned by a DHCP server” but its not recommended by Microsoft and not by me even. So change the network setting, once done choose “No, I will assign static IP Addresses to all physical network adapters”.
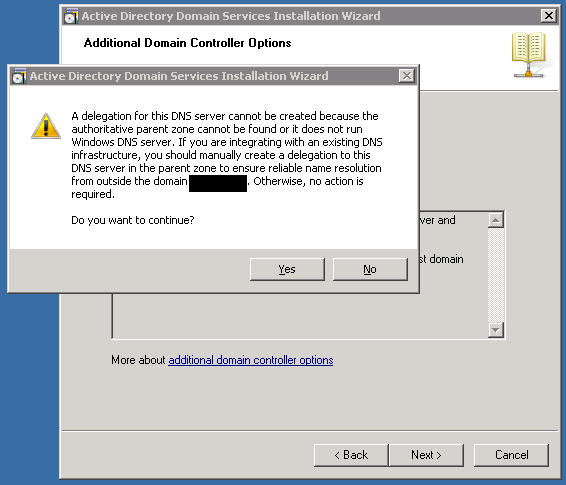
- Step 16: This step shows up because the installation realized that FQDN you specified have no option for delegation as identified by this installation. The domain name in our case is “example.com” and you might have purchased it from somewhere. The only action needed is to specify the name and IP Address of this machine as the domain’s primary name-server, so that proper name resolution for your domain names is done from outside the domain network i.e the web. The laymen explanation is “When someone types example.com, the nameserver should resolve and point to this server for the required information”. Click yes and continue.
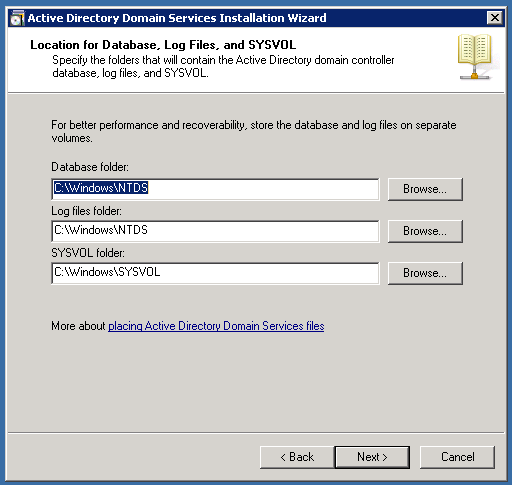
- Step 17: This shows the path where the different files and folders for this Active directory will be stored. The database for this ADDS, log files and SYSVOL files and information. You can configure to store at your desired location if you want and hit next.
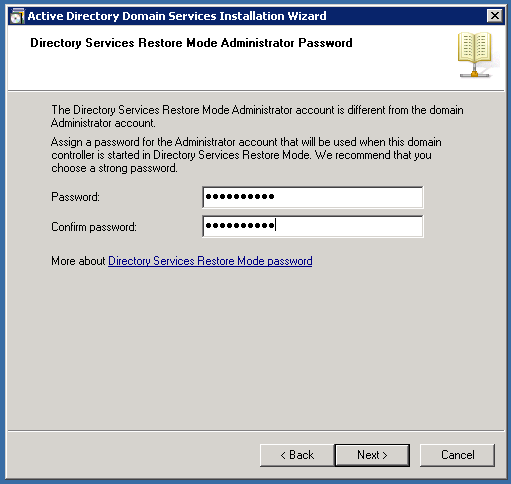
- Step 18: This step will ask for the domain’s administrator account password. This is the first and primary administrator account for this domain. Please type in a complex password and hit next.
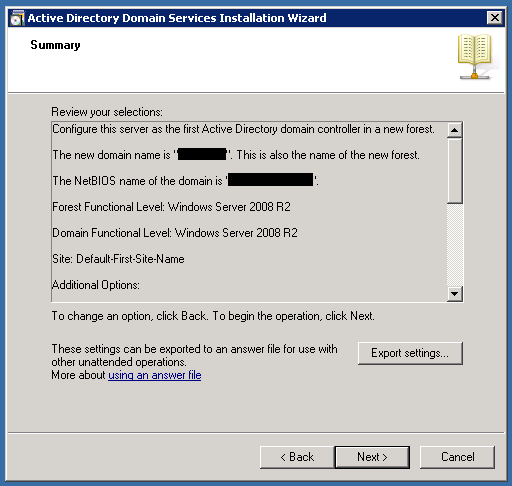
- Step 19: This last page of the configuration process shows the summary of the options you have selected previously to verify. You can use the export settings to save the options you choose to be used later on to perform unattended installation on other machine. Hit next to start the actual installation now.
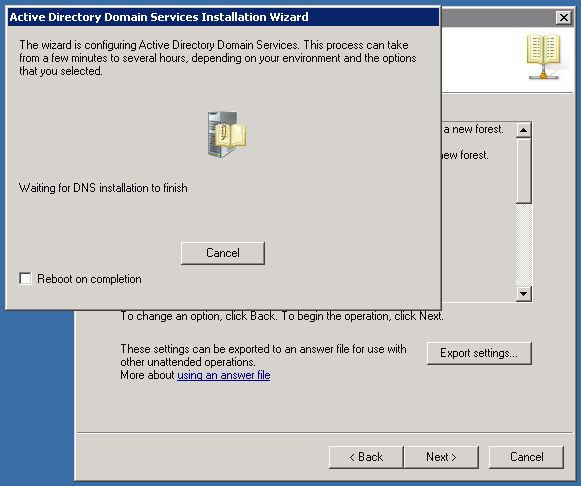
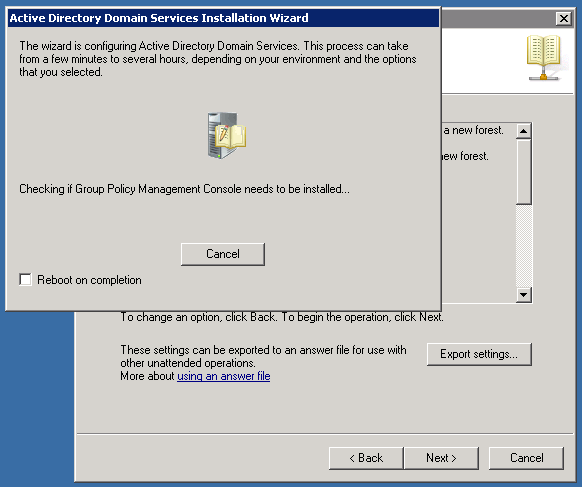
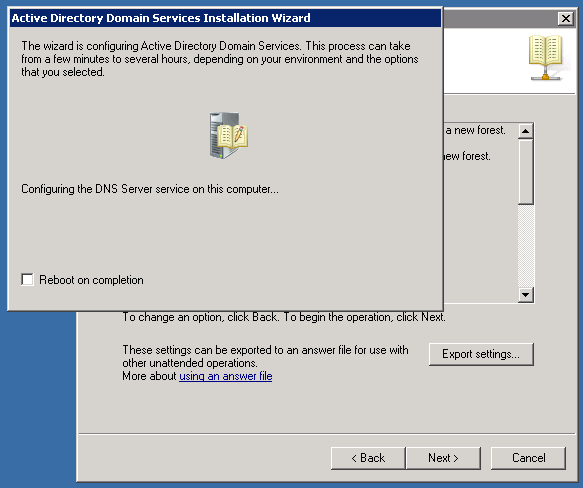
- Step 20: This screenshots shows some of the process happening during the installation. You can check “reboot after completion” to reboot automatically once done.


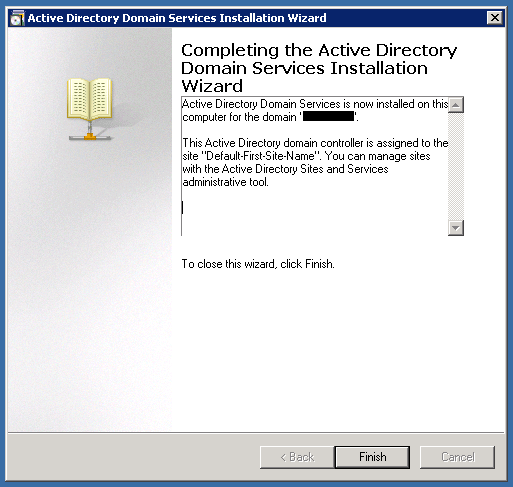
- Step 21: Final step is the completion for installation of Active directory domain services. Hit finish, reboot the server and you are good to go.
One thing you should verify by Click “Server Manager” > “Roles” > “DNS Server” > “DNS” > “TESTWIN2008” > Click “Forward Lookup Zone”. Here you will be able to see one entry for “example.com” as per our demo installation.
Note: Name-server change update may take 24 to 72 hours to reflect, resolve and point to your newly configured hosting server. Have patience.
Another Note: This works for Windows Server 2008 as tested while writing this post. The same steps may or may not work for other variants and version of Windows Server.