
These days Redis sparkle in my eyes, for lots of reason but the basic and most important reason is that it is deaam fast. Now we all know this can bring up an never ending debate but I am not going to be part of it because its fast and here I am not referencing it with comparison to other data-stores available.
Redis is an open source, advance key-value store. This key thingy can be strings, hashes, lists, sets and / or sorted sets. Quite a list :)
Note: This post was tested and written for Redis Version 2.8.3. This may or may not work for other or latest version of Redis Server.
I was impressed when I queried who is using Redis and the long list of clients libraries for most of the language available to work with Redis as your Key-Value store.
It is made to run on any main stream Linux machine but with open source efforts of Microsoft, it is also available for windows.
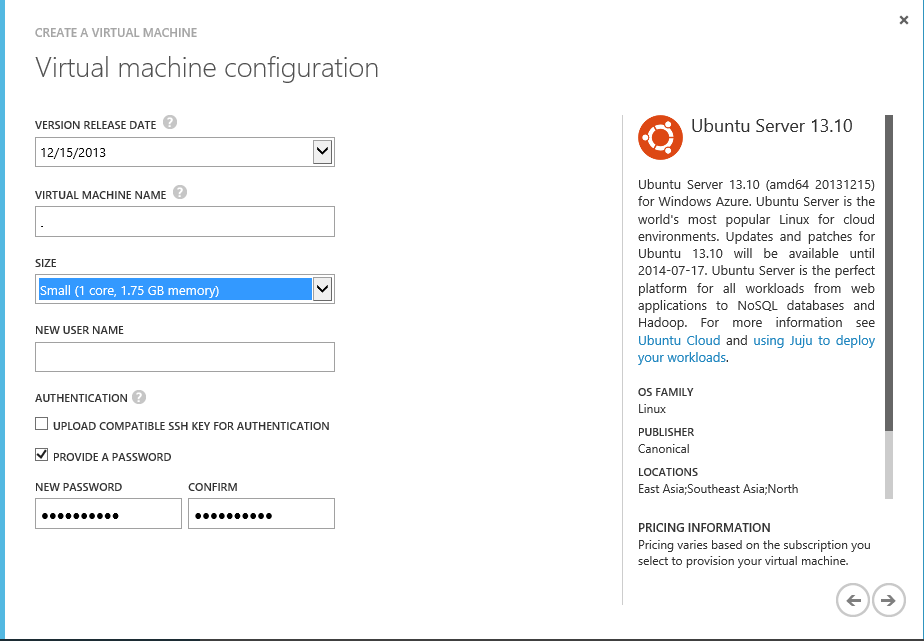
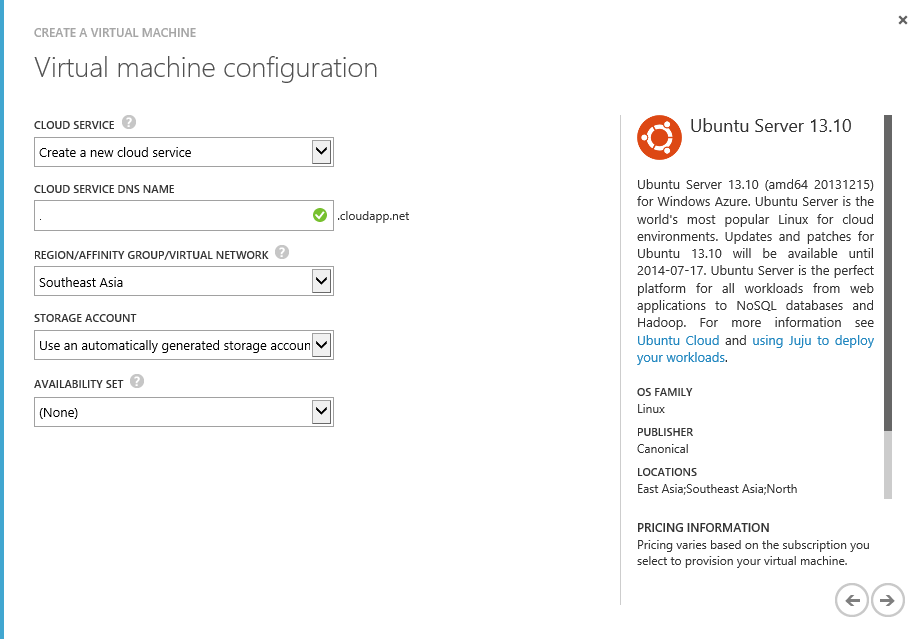
So I decided to install, configure and run Redis server on Ubuntu Server 13.10 and fiddle with it using C# redis client libraries available.
I am using Microsoft Azure Cloud Service (recommended for your cloud needs) for creating Redis server, you can do the same on your local Ubuntu machine, VM or any other cloud service you prefer.
Step: Create and setup Ubuntu Server 13.10 in the cloud

Step: Connect to your newly created Ubuntu Server 13.10 using SSH.
Now let me take a few lines to introduce CMDER, console / terminal emulator for Windows. I came to know about this awesome tool from Scott Hanselman’s Newsletter of Wonderful Things (thanks), December 17th, 2013 edition. Gawd now I cannot stand a windows command prompt on my screen.
So fire command window (cmder in my case) and connect to the Ubuntu Server using SSH.
$ ssh {your-ubuntu-machine-name-or-ip-address} –l {username}
Step: Make sure your Ubuntu machine is update-to-date (not mandatory, but no harm).
$ sudo apt-get update
Step: To install redis using source files, you will require the packages to build source (so called "build essentials")
$ sudo apt-get install build-essential
Note: If you want to check if the above or below packages are installed or not use the following command on Ubuntu or Debian
$ dpkg –s {package-name}
you will receive message “package ‘{package-name}’ is not installed and no information is available” if it was not installed.
Step: Next we need to install TCL package before you can start installing Redis server (Imp: I got errors on building source when I didn't installed TCL).
$ sudo apt-get install tcl8.5
Step: Download Redis release stable source code
$ wget http://download.redis.io/redis-stable.tar.gz
Step: Untar / extract the downloaded .tar.gz and navigate to the extracted folder
$ tar xzf redis-stable.tar.gz
$ cd redis-stable.tar.gz
Note: You can find the version of this Redis source in “[redis-folder]/src/version.h”. Mine is 2.8.3 at the time of writing.
Step: Now we compile the source with make command
$ make
Step: Test your compilation (not mandatory, but no harm)
$ make test
Step: Now that redis source code is compiled we install it
$ sudo make install
Step: Redis source comes with some helpful scripts, can be found in “[redis-folder]/utils”. One of the scripts we are interested is the one that configures Redis to run as a background process.
$ cd utils
$ sudo ./install_server.sh
- Default port number: 6379
- Default redis config file name: /etc/redis/6379.conf
- Default redis log file name: /var/log/redis_6379.log
- Default data directory for this instance: /var/log/redis/6379
- Default redis executable path: /usr/local/bin/redis-server
Step: Commands to start / stop redis server (the number is the one you set while running the previous command, 6379 in my case)
To start Redis server:
$ sudo service redis_6379 start
To stop Redis server:
$ sudo service redis_6379 stop
Step: You can check if the redis server is running and listening on your configured port number using following command. The number is the one you set while running install_server.sh script, 6379 in my case)
$ netstat –nlpt | grep 6379
Step: To set redis to run automatically on each boot use the following command
sudo update-rc.d redis_6379 defaults
Step: To verify if redis server is listening on IP-Address / host where you are expecting it to, run the following command
$ redis-cli –h {ip-address-or-host} ping
you will receive “PONG” as response if everything is setup correctly.
Note: Azure users need to add “6379” in their endpoint settings page for target virtual machine, if not then redis will only PONG for internal IP Address and not for Public Virtual IP (VIP) Address.
To customize your redis instance you can modify /etc/redis/6379.config file.
So you have a fine Redis up and running at this point.
Fire your Davenvy (devenv :D) and create a sample to connect with Redis server, add some data and retrieve the same.
For demo purpose I am going to use Boolsleeve but all the listed C# clients are great and fast especially ServiceStack.Redis, Booksleeve and Sider (no judging). Choose one depending on your needs.
C# client code using Booksleeve:
namespace Fiddling.RedisClient
{
    #region Namespace

    using System;
    using System.Text;
    using System.Threading.Tasks;

    using BookSleeve;

    #endregion

    /// <summary>
    /// Default program class for console application.
    /// </summary>
    public class Program
    {
        /// <summary>
        /// Main method.
        /// </summary>
        /// <param name="args">Input arguments.</param>
        private static void Main(string[] args)
        {
            var doRedisTask = Task.Run(() => DoRedis());
            doRedisTask.Wait();
            Console.ReadLine();
        }

        /// <summary>
        /// Do something with Redis server.
        /// </summary>
        /// <returns>Task of void.</returns>
        private static async Task DoRedis()
        {
            using (var connection =
            new RedisConnection("your-redis-server-ipaddress-port-number"))
            {
                await connection.Open();
                await connection.Strings.Set(12, "key01", "value01");
                var value = connection.Strings.Get(12, "key01");
                var storeValue = await value;
                Console.WriteLine(Encoding.UTF8.GetString(storeValue));
            }
        }
    }
}
Enjoy your fiddling with Redis.
Happy Coding !!